Self-hosting a Continuous Integration server using Drone.
This article will help you setup a self-hosted continuous integration and delivery server using Drone.
What you'll need:
- A DigitalOcean account.
- A GitHub or BitBucket account. For this article's purpose I'm going to assume your code is on GitHub.
Once this setup is complete, you will be able to import your projects into the newly setup CI server and have it automatically build and deploy your commits.
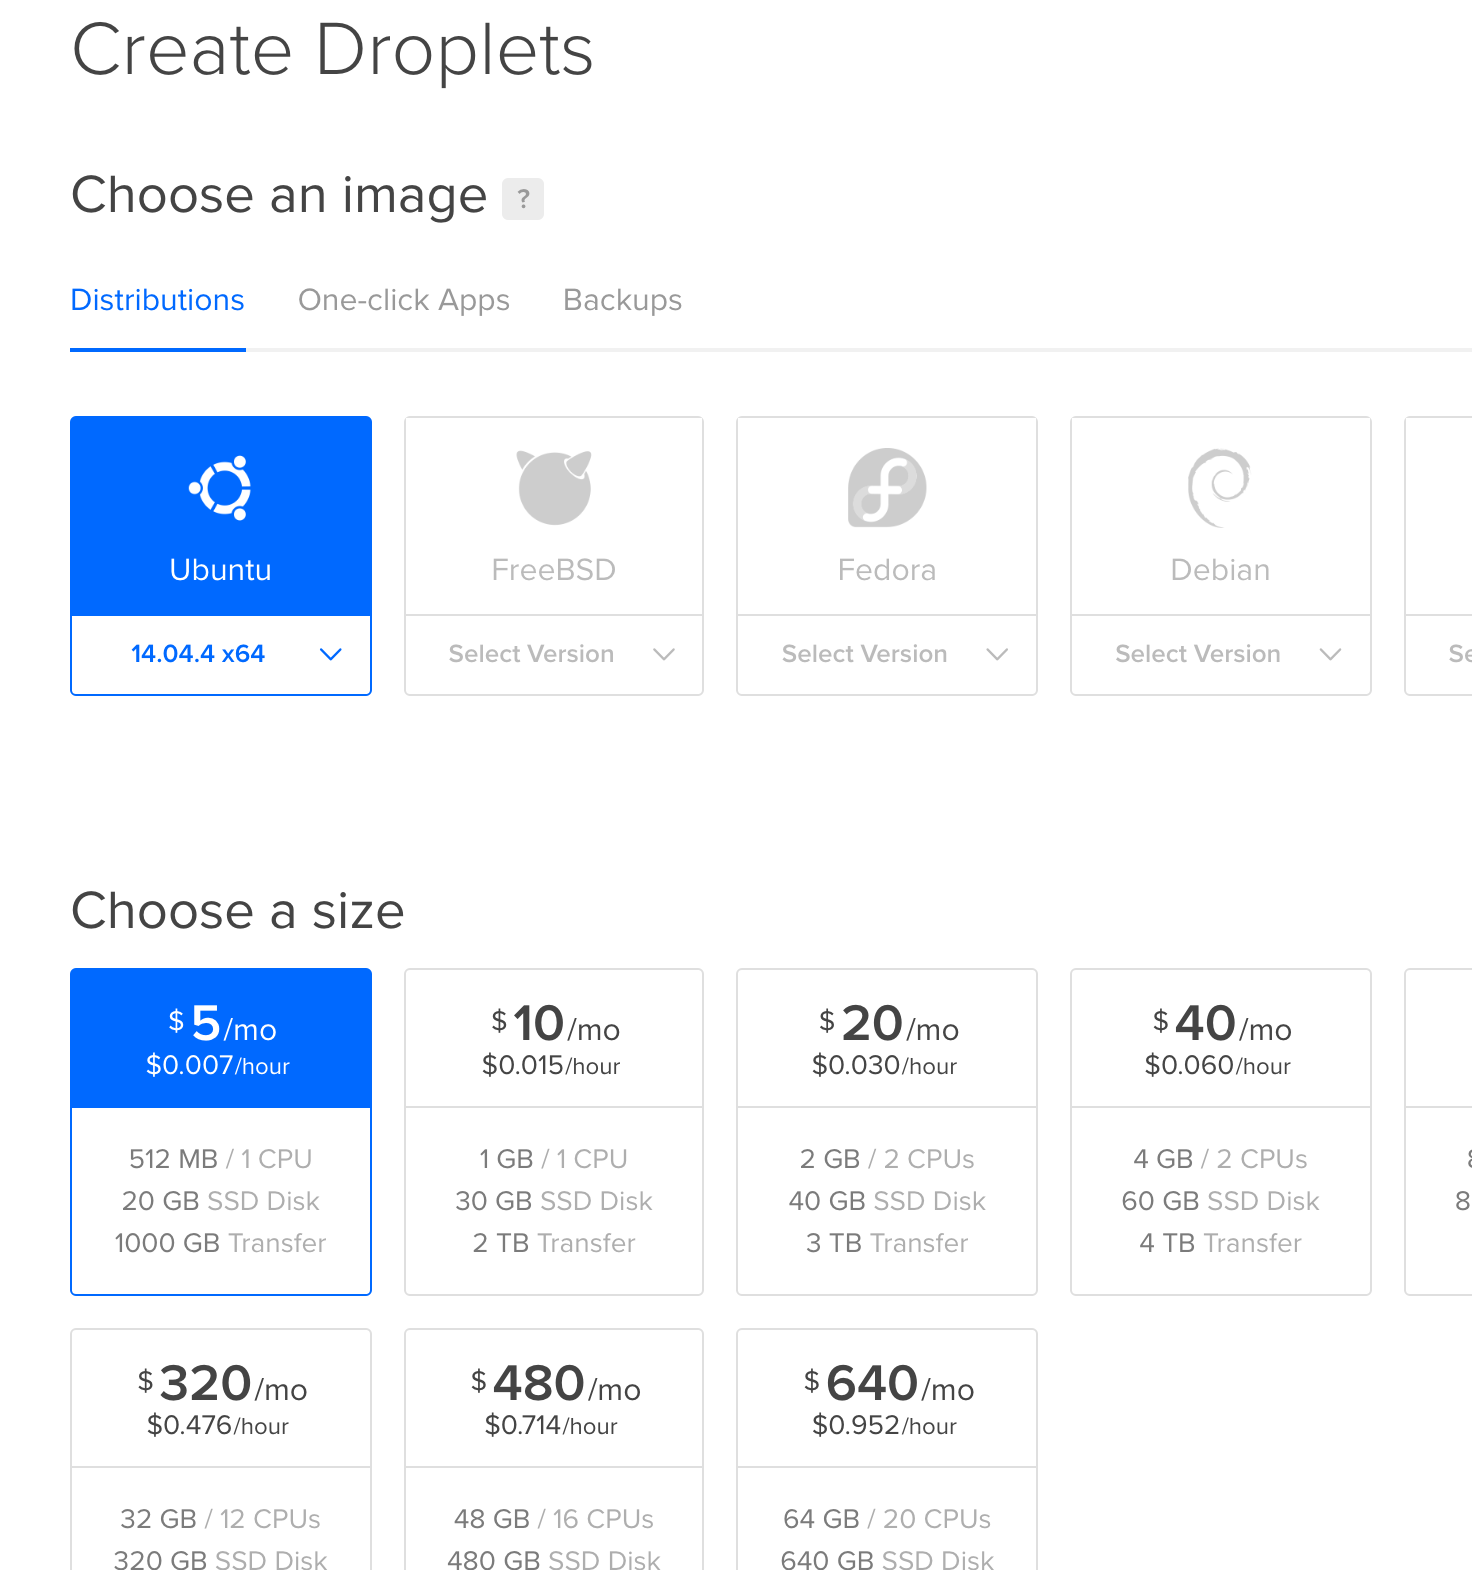
1. Create and configure a DigitalOcean droplet.
Use the DigitalOcean UI to create an Ubuntu 14.04 droplet. For demonstration purposes, I'm going to use the smallest instance available. For real life use cases, depending on the size and computation needs of your builds, feel free to pick a more configured box.
Make sure to check the SSH Keys section and provide your local development box's public SSH key (id_rsa.pub contents) to DigitalOcean so you can login without a password for root. The password-less login is only a preference here, but is highly recommended for added security.
Through the rest of the article, I will be referring to the public IP address of this droplet as DROPLET_IP. Anytime you see this, replace it with the public IP of your droplet.
Login to your newly created droplet with:
ssh root@DROPLET_IP
PS: Please follow the guide at https://www.digitalocean.com/community/tutorials/how-to-add-swap-on-ubuntu-14-04 to setup more swap memory on the droplet. This will help you run more sizable builds and keep it from running out of memory during builds.
2. Install Docker
Drone ships as a single Docker image. We need to enable Docker support on the droplet first to install Drone. Start by updating your box:
sudo apt-get update
sudo apt-get -y upgrade
Add docker repository key to apt-key for package verification:
sudo apt-key adv --keyserver hkp://pgp.mit.edu:80 --recv-keys 58118E89F3A912897C070ADBF76221572C52609D
Add the docker repository to Apt sources:
echo "deb https://apt.dockerproject.org/repo ubuntu-trusty main" | sudo tee /etc/apt/sources.list.d/docker.list
Update the repository with the new addition:
sudo apt-get update
Finally, download and install docker:
sudo apt-get -y install docker-engine
3. Setup an Application ID on GitHub.
Drone needs an application ID registered with one of the supported code hosting providers to be able to integrate and execute builds. For more information, read Remote Drivers on Drone Wiki.
For the purpose of this article, I'm going to use GitHub.
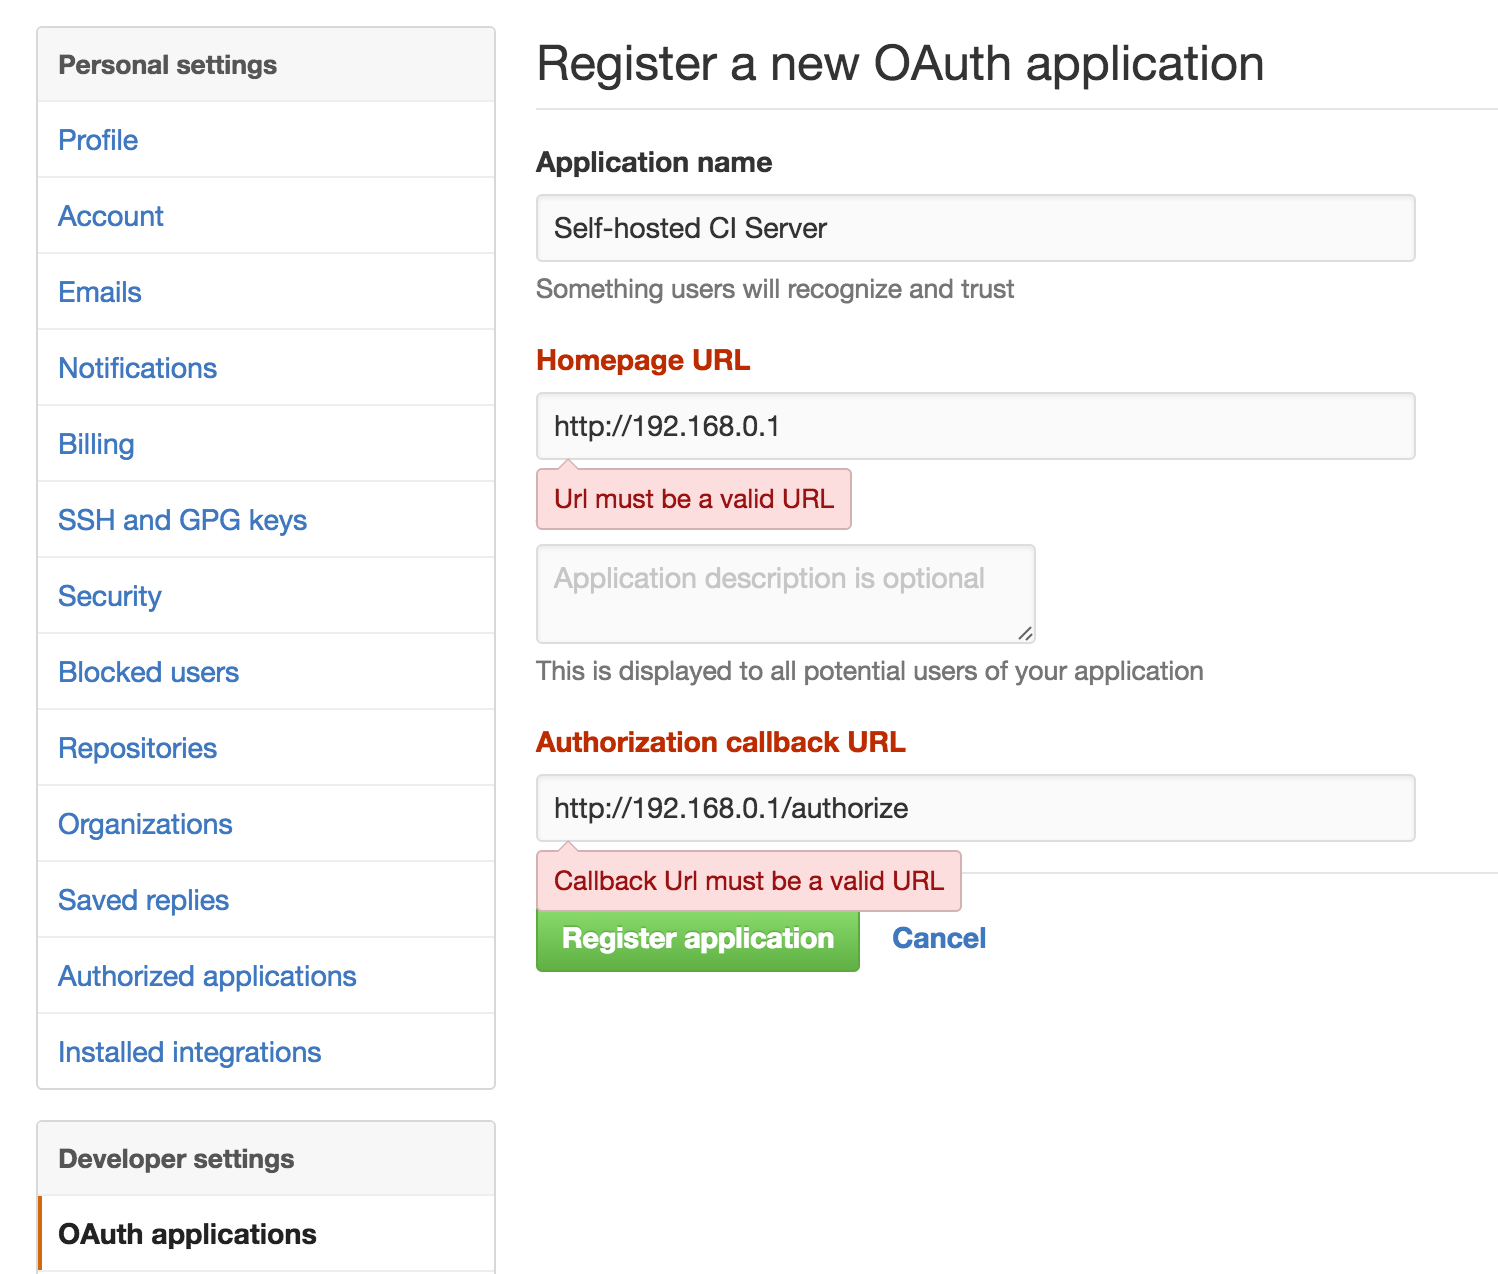
Go to GitHub's Settings > OAuth applications and provide a name for your CI server, the publicly accessible URL and an authorization callback URL. The most important one here is the Authorization callback URL. Make sure you provide http://${ip-or-hostname-of-droplet}/authorize as the URL here.
Once the application is created, note down the Client ID and Client Secret parameters of the application. We'll need it in the next step.
4. Install Drone.
Drone ships as a single binary file and is distributed as a minimalist 20 MB Docker image. Download the official Drone image from DockerHub:
sudo docker pull drone/drone:0.4
Create a /etc/drone/dronerc file. Docker will use this file to load environment variables from disk.
mkdir /etc/drone
vim /etc/drone/dronerc
Please note these variables should never be quoted. Use the Client ID and Client Secret from the previous step here. Enter the following, by replacing with appropriate values:
REMOTE_DRIVER=github
REMOTE_CONFIG=https://github.com?client_id=....&client_secret=....
Create and run the Drone Container:
sudo docker run \
    --volume /var/lib/drone:/var/lib/drone \
    --volume /var/run/docker.sock:/var/run/docker.sock \
    --env-file /etc/drone/dronerc \
    --restart=always \
    --publish=80:8000 \
    --detach=true \
    --name=drone \
    drone/drone:0.4
At this point, if you direct your browser to the IP/host name of your droplet, you should be able to see Drone running and ready to setup your first project. Congratulations!